Table of Contents
Updated : Apr 2, 2026
Photos are one of the biggest drivers of bookings. In a crowded market, they often decide whether a guest clicks your listing or scrolls past it.
Strong listing photos improve click-through rates, set clear expectations, and reduce booking hesitation—helping your listing convert views into bookings more consistently. As Airbnb search increasingly rewards engagement, photo quality directly impacts visibility and performance. If you want to go beyond photos and improve overall performance, here’s a complete guide on how to get more bookings on Airbnb.
This article breaks down five practical ways better listing photos boost bookings, with clear, actionable tips you can apply quickly, even on a limited budget.
Bonus Read: The Ultimate Airbnb Listing Optimization Strategy: Rank Higher & Get More Bookings
PriceLabs: Use Data-Driven Insights to Prioritize Photo Improvements
Not all photo updates deliver the same impact. For hosts with limited time or budget, the key is knowing which listings—and which moments in the guest journey—need visual improvement first.
Using the PriceLabs Listing Optimizer, hosts can take a more structured, data-driven approach to listing optimization instead of making visual updates blindly. The Listing Optimizer helps identify listings that attract views but struggle to convert, making it easier to prioritize where photo improvements will have the biggest payoff.
Rather than refreshing photos across every listing equally, focus first on:
- Listings with high visibility but lower-than-expected bookings
- Properties underperforming compared to similar nearby listings
- Listings that show a recent slowdown in booking pace
Bonus Read: Airbnb SEO: Optimize Airbnb Listing for #1 Rank
How to apply this in practice
- Use the PriceLabs Listing Optimizer to flag listings that need optimization attention
- Prioritize updating cover photos and early gallery images, since these influence clicks most
- Track performance changes after photo updates by monitoring views, inquiries, and bookings over time
With PriceLabs Listing Optimizer You Can Analyze The Quality Of Your Competitor's Listings.
With PriceLabs Listing Optimizer, you will be able to compare your listing with other listings guests would consider your competition and optimize your listing accordingly.
Create your Account NowWhat to fix first if you’re short on time
Listings that already get traffic offer the fastest wins. Improving photos on listings with visibility but weak conversion typically delivers better results than spreading effort evenly.
| Listing type | Photo priority | Expected impact |
|---|---|---|
| High views, low bookings | High | Improved conversion |
| Low views, low bookings | Medium | Visibility still limits impact |
| High bookings, strong performance | Low | Maintain, don’t overhaul |
By pairing targeted photo improvements with insights from the PriceLabs Listing Optimizer, hosts can focus their effort where it directly supports higher bookings—without unnecessary work or guesswork.
Leverage High Dynamic Range (HDR) Photography for Clear, Balanced Images
Lighting is one of the most common reasons Airbnb photos underperform. Dark interiors, blown-out windows, or uneven shadows make spaces look smaller and less inviting than they actually are. HDR photography solves this problem directly.
HDR (High Dynamic Range) photography combines multiple exposures of the same scene to balance bright and dark areas, revealing details that standard photos often miss. The result is images that feel brighter, cleaner, and more accurate to the real space.
Where HDR matters most
Use HDR selectively for spaces where lighting contrast is highest:
- Living rooms with windows
- Kitchens with mixed natural and artificial light
- Bedrooms with bright exterior light
- Outdoor spaces with shade and sun
How to apply HDR (even on a budget)
- If hiring a photographer, confirm HDR processing is included
- If shooting yourself, use a smartphone’s built-in HDR mode
- Avoid over-processed HDR that looks unnatural or “glowy”
- Keep colors neutral and true to the space
What to fix first if you’re short on time
Start with your cover photo and first 5 images. These photos drive clicks and set expectations. Replacing dark or uneven images with clean HDR shots often delivers immediate improvement in listing engagement.
HDR isn’t about making your listing look dramatic—it’s about making it clear, honest, and easy to evaluate, which helps guests book with confidence.
Bonus Read: Cracking the Code: How to Master the Airbnb Algorithm
Utilize Twilight Photography to Create Inviting Ambiance
While daylight photos show layout and space clearly, twilight photography helps your listing stand out emotionally. These images are taken just after sunset, when the sky is soft, interior lights are warm, and outdoor features feel more inviting.
Twilight photography captures a property during the short window between day and night, highlighting lighting, depth, and atmosphere. For guests scrolling through dozens of listings, these images create contrast and draw attention.
Bonus Read: How To Promote Your Airbnb Listing In 8 Easy Steps
Where twilight photos work best
Twilight images are most effective when your property has:
- Outdoor lighting or string lights
- Balconies, patios, or decks
- Pools, hot tubs, or fire pits
- Scenic surroundings or city views
How to use twilight photos strategically
- Use one twilight image as your cover or hero photo
- Place it early in the photo sequence, not at the end
- Pair twilight shots with clear daytime images for balance
- Avoid overusing them—1–2 strong twilight photos are enough
What to fix first if you’re short on time
If you can add only one twilight photo, make it the exterior hero image. This single change can significantly increase clicks without requiring a full photo refresh.
Twilight photography isn’t about replacing daylight photos—it’s about adding visual warmth and emotional appeal that helps your listing stand out instantly.
Bonus Read: What To Do When You’re a Brand New Listing With No Reviews
Incorporate Virtual Tours and Videos for Immersive Guest Experiences
Photos help guests understand a space, but virtual tours and videos help them trust it. For guests booking sight-unseen, immersive visuals reduce uncertainty and make it easier to commit.
A virtual tour is an interactive, panoramic experience that allows guests to move through your property online. Short-form videos, on the other hand, guide viewers through the space in a more narrative, mobile-friendly way. Together, they help guests visualize the stay more clearly than photos alone.
Why immersive visuals improve bookings
- Guests spend more time engaging with listings that include tours or videos
- Clear spatial understanding reduces last-minute questions and hesitation
- Transparency builds confidence, especially for longer stays or higher nightly rates
How to add virtual tours and videos (practically)
- Add one virtual tour per listing to showcase layout and flow
- Create a 30–60 second walkthrough video covering key areas
- Film horizontally for desktop viewing and vertically for mobile/social reuse
- Keep movements slow and steady to avoid distortion or confusion
Simple checklist before publishing
- Show room transitions clearly (no jump cuts)
- Match lighting and cleanliness to your photos
- Avoid filters that misrepresent space or color
- Ensure tours and videos load quickly on mobile
What to fix first if you’re short on time
If you must choose, start with a single walkthrough video. It’s faster to produce than a full virtual tour and still gives guests a strong sense of space and layout.
Used correctly, virtual tours and videos don’t replace photos—they support them by removing doubt, helping guests feel confident enough to book without hesitation.
Bonus Read: Airbnb Title Names: (22+ Examples) & Ways to Attract More Booking
Tell a Story with Photos to Connect Emotionally with Guests
Guests don’t just book a place to sleep—they book the experience they imagine having there. Story-driven photos help guests picture themselves in your space, making your listing feel more personal and memorable.
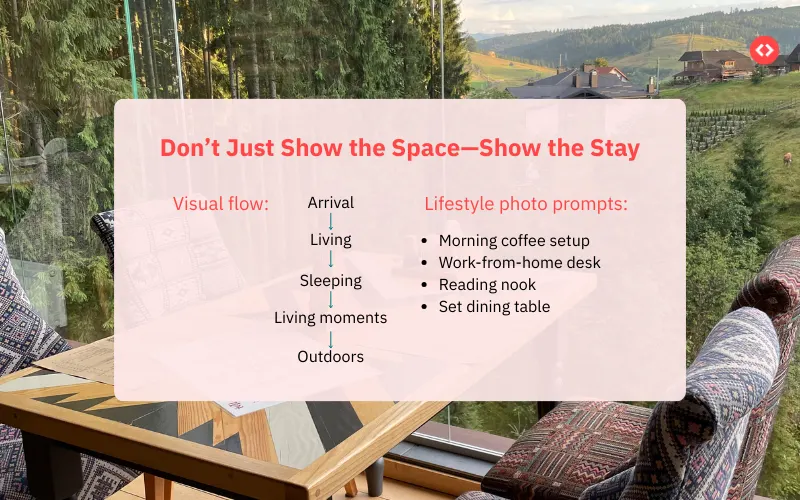
Story-driven photography focuses on sequencing and context. Instead of treating photos as standalone images, you curate them to show how a guest arrives, settles in, and enjoys the stay. This emotional connection often influences booking decisions just as much as amenities or price.
How storytelling improves listing performance
- Helps guests visualize daily moments, not just rooms
- Communicates lifestyle and use-cases clearly
- Builds trust by setting realistic, appealing expectations
What to capture beyond standard room shots
Add photos that show how the space is used:
- Morning coffee on the balcony or patio
- A cozy reading corner or work-from-home setup
- A set dining table or welcome tray
- Outdoor relaxation areas in use
How to sequence photos for maximum impact
- Start with a strong exterior or hero image
- Move through the space logically (entry → living → bedrooms → extras)
- End with lifestyle or neighborhood context shots
What to fix first if you’re short on time
You don’t need new photos for every room. Adding 2–3 lifestyle images to an existing gallery can significantly improve how guests emotionally connect with your listing.
When photos tell a clear story, guests don’t just understand your space—they feel what staying there would be like, making them more likely to book.
Bonus Read: 10 Ways High-Quality Listing Content Boosts Vacation Rental Bookings
Maintain Consistency and Professional Quality Across All Photos
Inconsistent photos can quietly undermine an otherwise strong listing. When lighting, color tones, or image quality change from one photo to the next, guests may question how accurately the space is being represented. Consistent, professional-looking photos help build trust and make your listing easier to evaluate.
Professional-quality photos don’t need to be dramatic or heavily edited. They should look clean, realistic, and cohesive across the entire gallery. At a minimum, your photos should be:
- Sharp and clear
- Evenly lit with natural-looking light
- Color-accurate, without strong filters
- Free from clutter or distractions
Inconsistency becomes most noticeable when older photos are mixed with newer ones, when some rooms appear dark while others look bright, or when smartphone images are combined with heavily edited professional shots. These mismatches can create doubt, even if the property itself is well maintained.
To maintain consistency, aim to use the same photographer or editing style whenever possible. Keep brightness, color temperature, and contrast similar across all images, and photograph comparable rooms from similar angles. This creates a smoother visual flow and makes the listing feel more polished.
If you’re short on time or budget, focus first on replacing outdated or visibly lower-quality photos so they match the rest of your gallery. Consistency matters more than perfection, and aligned visuals help guests feel confident moving from browsing to booking.
Frequently Asked Questions
How much can better photos increase my Airbnb bookings?
Upgrading your listing photos can significantly improve performance. Techniques like HDR and twilight photography are proven to increase views and help listings book faster by making spaces clearer, brighter, and more appealing to guests.
What defines high-quality Airbnb photos in 2025?
High-quality photos are sharp, well-lit, and color-accurate. They clearly show the layout of each space, avoid heavy filters, and set realistic expectations so guests know exactly what they’re booking.
How often should I update my listing photos?
Refresh your photos at least once a year, or anytime you change furniture, repaint, renovate, or notice a drop in views or bookings. Even small updates can make a listing feel current again.
Should I invest in professional photography or use smartphone photos?
Modern smartphones can work well with good lighting and composition, but professional photography often delivers more consistent results—especially for cover photos, HDR shots, and exterior images.
How many photos should my Airbnb listing include?
Aim for 20–30 photos per listing. Lead with 3–5 strong images, then show every room, key amenities, and a few lifestyle shots to help guests visualize the stay.